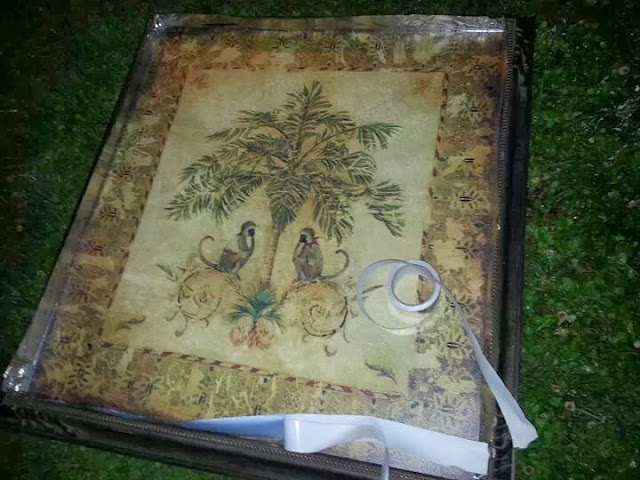
- 1 - square table (with a table top that is able to be removed from the frame of the table)
- 1 - old French window (one that is as big as the table top you will be taking off the table from)
- Paint
- Glass
- Paintable wallpaper *optional*
Wednesday, May 14, 2014
French Window Topped Table!
Friday, April 18, 2014
Record Player turned Bathroom Vanity
I found this beauty at Restore in Mooresville for $35.
I instantly saw that this should have a farmhouse sink setting in it. Figuring that the rest of the design details would be revealed along the repurposing road, I loaded it up and took home. I then realized I needed to find a Farmhouse style sink. Which wasn't nearly as a difficult as I thought it was going to be because I found a beautiful cast iron sink for $20 on my return trip to Restore later that week.
After removing the guts of the record player and the light that was cleverly disguised as a drawer, removing the door hard ware, removed doors, and a few precision cuts, it was time for paint.
Adding a little water to a can of wall paint and using a brush, gave me the weathered color I was looking for (thanks to Pink Punk Design for the paint tutorial they posted earlier). I used silver leafing paint to color the hardware and knobs. I ran sheet metal ( found at Restore) through an embosser machine for the side door panels.
I delivered the vanity back to Restore in Mooresville Friday April 11 where it would be priced and sat on display to promote the blog and the upcoming Designer Challenge with a cool little "before and after" photo. But before I had the chance to bring the photo back to the store on Saturday 4/12, it had already been sold. I am just thankful that I had snapped a quick picture of it after unloading it from my car in the parking lot solely for the purpose of texting my mom. Otherwise I would not had have any after pictures at all.
Friday, March 21, 2014
DIY Pot Rack
Next, find the studs in your ceiling. This is of utmost importance. It can be done quite easily with a stud finder. There is nothing worse than having your gorgeous project come crashing down in the middle of a dinner party. Here is what else you will need:
- 4 big screw-in hooks that you will space into the studs to coincide with the corners of the rack
- mid-weight chain
- 4 u-shaped bolts
- some hooks to hang the pots.
Now that you have your materials you are ready to get started. Simply screw the four hooks into the ceiling, attach four lengths of chain to the corners of the rack using the U-bolts, hang the other end of the chain from the ceiling hooks, hang your pots and pans from the s-hooks and VIOLA! Pot rack!
Monday, March 3, 2014
Rubik's Photo Collage
I am actually poaching this next project from my mother-in-law. She made one of these for all of us at Christmas and they are just so amazing that I had to share.
The best part is that I almost always see a Rubik's Cube on the toy aisle of Restore for no more than $ 2. Not to mention that you can also pick up a cooling rack or drying tray that you will need for this project while you are there for as little as $. 50 each. And I have been able to snag a good deal on photo paper on occasion. I really wouldn't be shocked if I found the resin needed on the craft aisle either. So stop by your local Restore and see how very inexpensive this project can be.
8. Proudly display your crafty work of genius or wow and amaze someone with a very special gift.
Tuesday, February 11, 2014
This Guest Bloggers Knows Paint!
Hello Reclaimers! I am Karen Adams and a new blogger
for My [Re]claimed Home! I thought I would share a little about myself and then
go onto giving you some tips and tricks that you can use on your own projects.
First things first, who am I. Well I started my
reclaiming, dumpster diving, garage sale picking, Restore shopping fetish about
10 years ago. I have always been blessed with a great artistic ability -being
able to paint, draw, sculpt and much more, however after high school and a
semester of college I wanted to do even more than the average artist. I wanted
to use my talent in a unique way but I wasn’t sure how. Unbeknownst to me the
answer was about to present itself in a very innocent way.
My mother-in-law was having a garage sale and had a
tired old baker’s rack that she thought would sell if it just had a little coat
of paint. So I took on the challenge! I painted the rack and added some design
flair to it and before I knew it a light bulb went off. I wanted to do this! I
wanted to redo furniture, make it one of a kind and wow people. And of course
it didn’t stop there. I not only redo furniture but I also create new furniture
and items out of … for a lack of a better word… “Junk”
I LOVE what I do with a passion! I take great pride in my work and love to share my talents with the world. I teach people how to get past their project dilemmas and how to look at items in a new light (I also started Pink Punk Design on Facebook with my Mother in-law, Laurie Hamilton, for anyone who is interested in getting tips and tricks on a whole wide range of topics)
OK so enough about me! Let’s talk PAINT!
Not just any paint but the up and rising popular
chalk paint!
This
diverse eco-friendly paint is so easy to use! Add a little water to it to make
it smooth, thicken it up by leaving the lid off, and make it into a wash by
adding even more water. Use flat brushes for a smooth look or bristle brushes
for a more textured aged look. It is so simple and diverse! It covers most
surfaces with little to no priming at all. I encourage everyone who paints to
have this in their arsenal!
Now
you may be asking yourself, this is great but where do I get it? Well the more
popular brands such as Annie Sloan, CeCe Caldwell, American Paint co, FAT
paint, Maison Blanche, Van Gough, and Shabby Paint (just to name a few) are
great but they can cost anywhere from $29.99 -
$38.95 per Quart!
This
is just out ragout in my opinion especially since you can make your own for
about $5.00!
This is what
you will need:
(I
normally go to Lowes or Home Depot)
Color sample pots in your color choice – Must be Latex based (Valspar is
my go to brand $2.98 each)
White Plaster of Paris (this will last you a LONG
time so it’s a great investment) $6.48 @ Lowes
Furniture wax $9.97 @ Lowes ** (optional, but
recommended)
Now Mix:
1/2
cup of Plaster of Paris with a 1/2 cup of warm water until it dissolves. Once
its dissolved, add 1 1/2 cups of latex paint (the whole container if your
sample color is Valspar)
How
to use:
Paint
like you normally would! If you want it thicker, let it sit out a while. If you
want it as a wash, add more water, or just use it as it is after you mix it.
Also you may or may not need two coats. See how the first coat goes and use
your best judgment depending on what look you are going for.
Tips:
· You will want to wax your project to protect the surface from chips and wear and tear. This step is not required but is highly recommended.
· For a more textured look switch out the plaster of Paris with white non-sanded grout.
·
Don’t forget to sand for a smooth finish look
Monday, February 3, 2014
Puzzling Sideboard
My mother called me the other day after attending a meeting with the art guild she is a member of with a cute puzzle to see if you have an "artistic mind." The equation is:
2+2= fish
3+3= eight
7+7= triangle
I got it. If the answer isn't as clear for you, I will share at the end of this next Restyle story.
The answer to the test above reminded me about the sideboard buffet table I had made for the 2013 Restore Restyle Event. This one did require the obsessive compulsive disorder or perfectionism that only my husband can add to any project. So where I may have been the brain power behind the concept and design behind the materials to be used, and after 3 days of thoroughly explaining to him exactly how a bed canopy, a wood door, 2 cabinet doors, 8 hardwood floor strips, and some granite tiles were going to come together, his craftsmanship is what made it come to life.
My next challenge was to find a wood door that would match the rails and looked exactly like what I had pictured in my mind. (turns out it wasn't that big of a challenge, it was on the first aisle among the vast selection of varieties of doors and was $40)Monday, January 27, 2014
Picture Perfect Table
Picture Frame Table
During a visit the other day with a neighbor, I sat down at her kitchen table and realized that it had been the table that I had made for the Restore Restyle Designer Challenge that she had bought the night of the event. Seeing it again and talking about how it came to be, I thought I should share that process.
I had came across this giant framed picture at the Restore in Mooresville. Though I wasn't in love with the picture inside, I was in love with the frame and all of it's details and it's perfect square size. 
The mystery challenge item that we had to incorporate into our room design was an electrical light switch plate. I painted 8 with copper leafing paint and attached them to each far corner onto the base moulding around the table. I then took metal necklace charms and snapped off the ring on top where the charm would hang from a chain and glued them to the center of each switch plate.

Once the epoxy had thoroughly dried, I placed a piece of plexiglass from Restore cut to size on top and sealed it to the frame with the silicone caulk.